Entering Customer Invoices
There are two ways you can enter customer invoices in Quant. If you create the customer invoices yourself in Microsoft Word or through other similar software, you will then need to manually enter them into Quant.
However, you can also create and send invoices from within Quant itself. This also allows you to set up payment reminders and automatically send recurring invoices to your customers.
Invoice settings
Before entering any invoices you will need to select your chosen entry method. To do this go to Document Settings > Invoice Options Tab, as shown below:

Entering manual invoices
To manually enter your invoices simply go to Enter Transactions > Customers > New > Invoice. You are then able to enter the details of your invoices, as shown below:

For each one you should enter the date on the invoice, select the customer you issued it to (you should add the customer if they are not on the list), the appropriate sales account (if you have more than one), the reference on the invoice (usually the invoice number) and the net amount (amount before VAT is added).
Please note: If you specified in the initial wizard that you are not VAT registered you will only see the total amount field with no reference to VAT.
If you are VAT registered, there are three different VAT codes you can use on your invoices:
ST: This is standard VAT which will be used in most cases. This is automatically set at the current rate of 20% but can be edited if some of the services/products you provide need to be entered at the reduced rate of 5%.
EX: This covers services/products you provide that are exempt from VAT or zero-rated. Examples of exempt sales are insurance and education. Examples of zero-rated sales are food and books.
NV: This covers transactions that do not relate to VAT. You may require this if you sell to countries outside of Europe or use transactions where VAT does not apply, such as payments to employees or loans.
To enter another invoice click the plus button. Once you have finished simply click ‘Save All’.
Creating and sending invoices
If you have chosen to create your customer invoices in Quant itself, you will have a few more options to choose from. To see these go to Document Settings > Invoice Options Tab, as shown below:
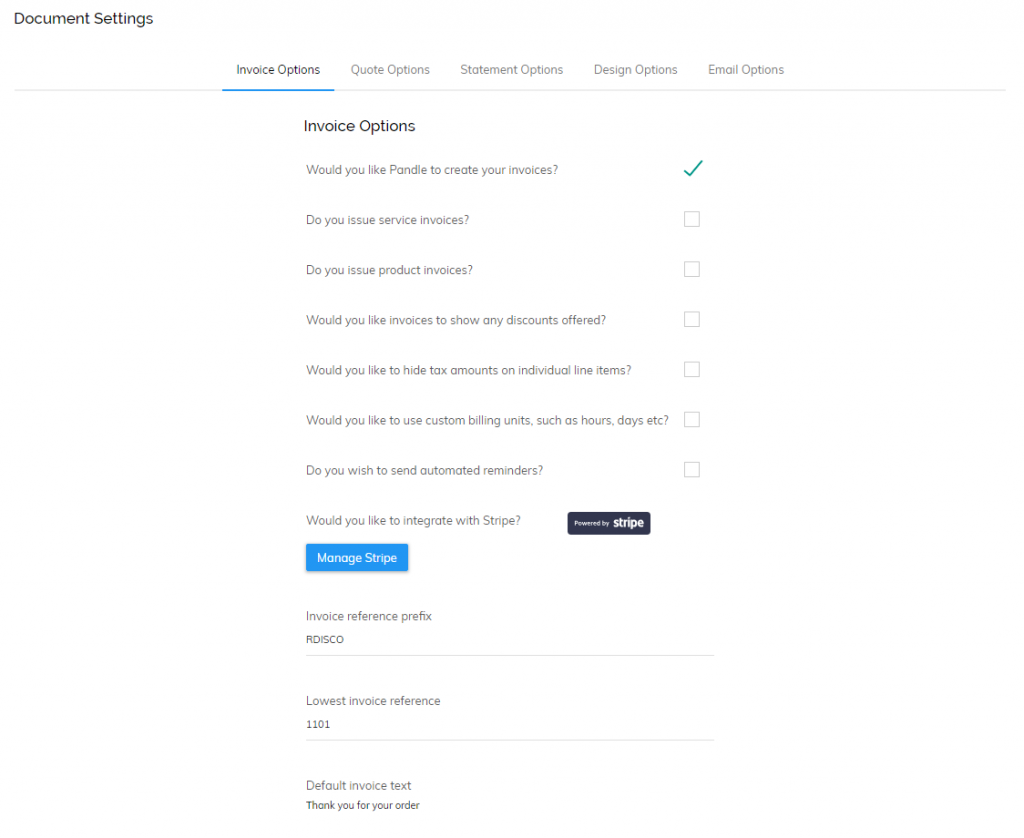
It’s always best to ensure your invoice settings are set correctly before raising any invoices.
Invoice Referencing: This setting allows you to enter the invoice reference prefix and starting number. You can also include a customer reference unique to your customer when adding or editing customers. So, for example, you could have your starting invoice reference as ‘101’ or ‘CompanyRef-101’ or even ‘CompanyRef-CustomerRef-101’.
Automated Reminders: You should tick this box if you would like Quant to automatically send email reminders to customers who do not pay you on time. Once selected you will be presented with the option to set up your reminders, including the frequency and the content of the emails.
Invoice Text: There is a box for ‘Default Invoice Text’ which you can use to enter any text you would like at the bottom of your invoice. For example, you may want to add a note thanking customers or suppliers for their business, or add in your payment information or invoice terms such as ‘Payment due 30 days from the date of this invoice’.
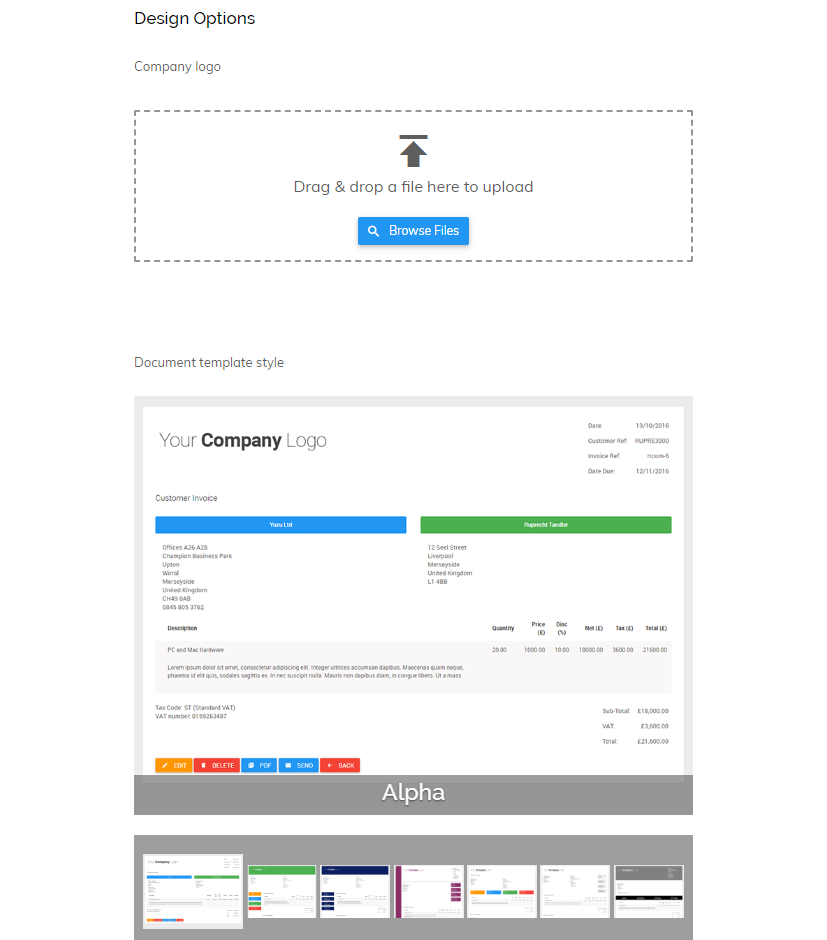
Invoice Template: If you’re using Quant Pro you also have the option to choose between various templates for your invoices. Simply click on the Design Options tab and select the invoice you prefer most. You can also upload your company logo here to appear on your invoices when you create them.
Now you have completed the invoice set up, it’s time to start invoicing.
To create your invoices in Quant simply go to Enter Transactions > Customers > New > Invoice. You are then able to enter the details of your invoices, as shown below:
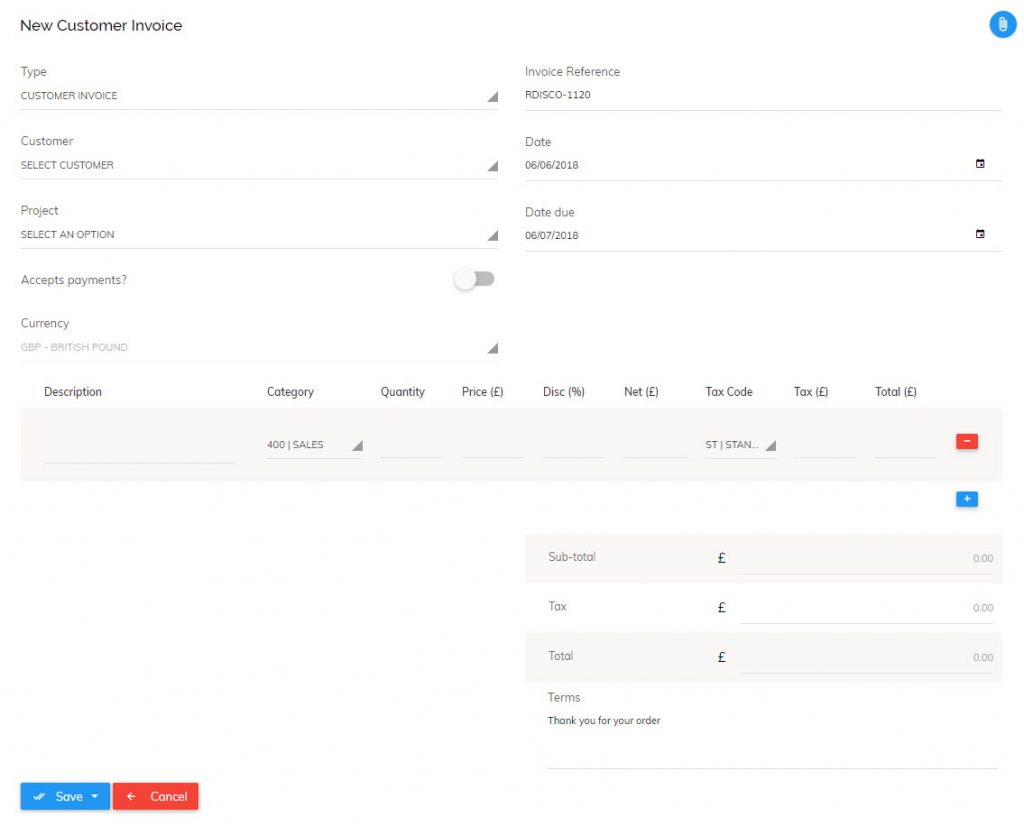
You will then be asked for key information so Quant can prepare your invoice. Here you’ll need to input the customer (you can add a new one from here if they are not on the list), the category (usually sales), the description for the invoice and the price. You can add further rows by clicking on the blue ‘+’ button.
You then have a few options for what to do next:
Save and Next: This will allow you to save the invoice and enter another one straight away.
Save and View: This will present you with a preview of the invoice. From here you can then edit, delete, convert to PDF or send the invoice to your customer.
Save and Finish: This will save your invoice and take you back to the Customers screen.
Save and Recur: If you know you will regularly invoice this customer for the same amount then you can select this option which will allow you to automate future invoices to save time.
Once your invoice has been created you can return to the Customers screen to see the increased amount the customer owes to you. You can view all previously created invoices under ‘View’. This allows you to drill down into each invoice to see an audit trail and much more.
When customers pay your invoices, you can apply those payments to the appropriate invoices when you process your banking transactions in the Banking tab.
Payment reminders, recurring invoices and payment collections via Quant Pay are also available.